
Facebook Domain Verification provides a way for you to ‘claim’ ownership of your domain in Facebook Business Manager. This is important to protect your content on Facebook and to gain access to features related to your domain and tracking.
If you are using conversion events related to the Facebook Pixel or Conversions API, Facebook domain verification will be done in your Business Manager.
If you are verifying a domain on behalf of a client (e.g. as an agency) please make sure that the domain is verified in the domain owner’s Business Manager. They can always share access to the domain with your Business Manager later.
Table of Contents
How to Add your domain in Business Manager
- Go to Business Manager: https://business.facebook.com
- Go into the Business Settings tab in Business Manager and click ‘Domains’.
In Business Manager, click on the Business Settings button in the upper right corner.
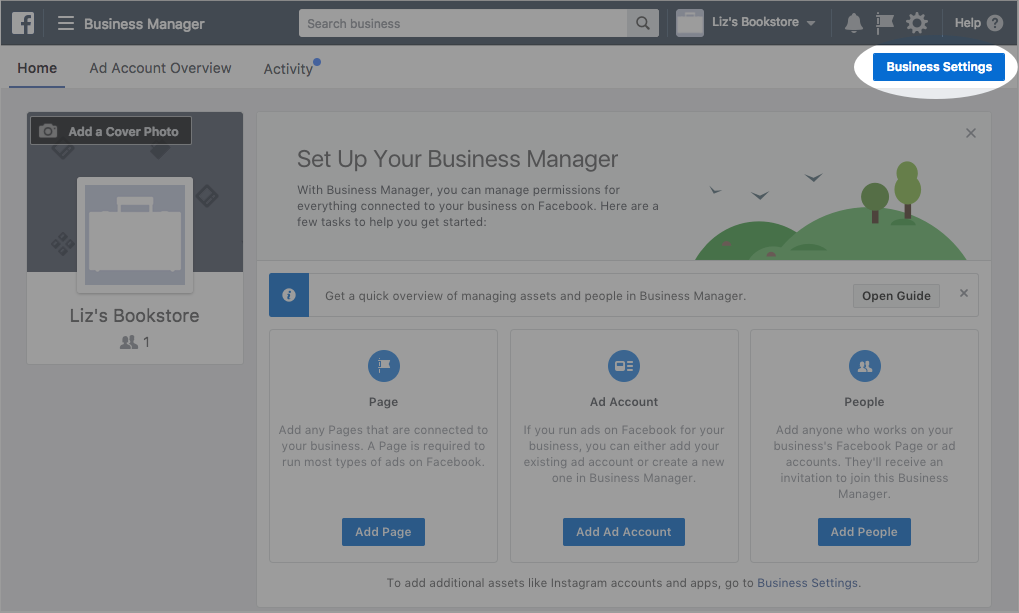
3. In the Business Settings, select the Brand Safety tab, and select Domains from the left side navigation list.
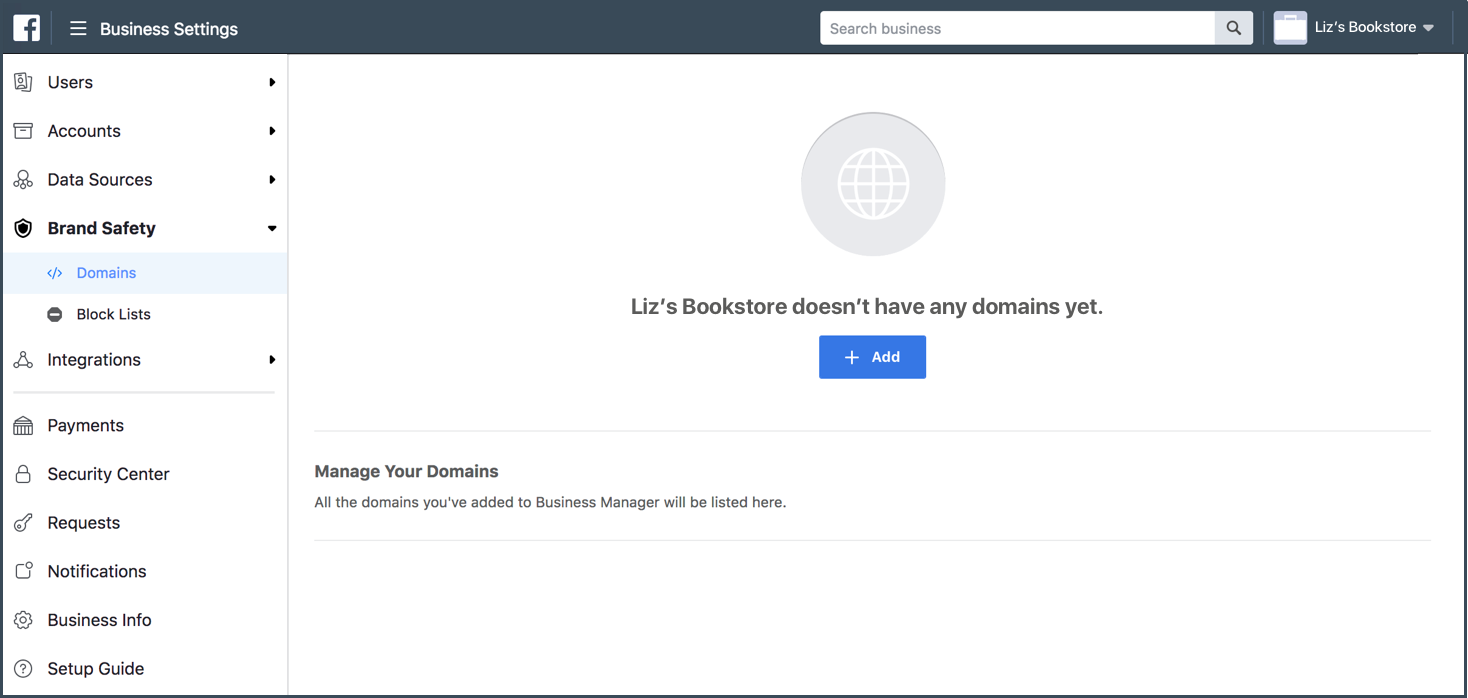
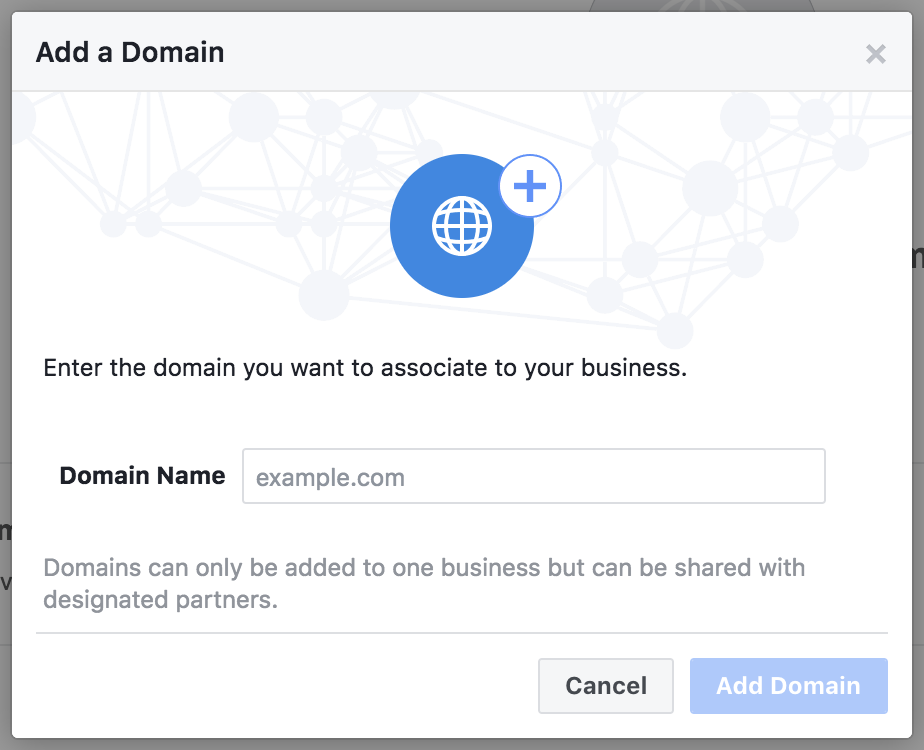
4. Click on the Add button, and enter your domain in the Add a Domain pop-up dialog.
5. If you have more than one domain listed, select the domain for which you desire to confirm ownership.
6. Choose the method you wish to use to verify your domain: DNS Verification, Meta Tags or the HTML File Upload.
You only need to use one verification method!
How to Verify your domain
There are 3 different methods to verify your domain name in Facebook Business Manager.
Only one method is needed for Facebook domain verification, so there is no need to implement all 3 options. Choose which method works best for your website and follow the steps.
DNS Verification
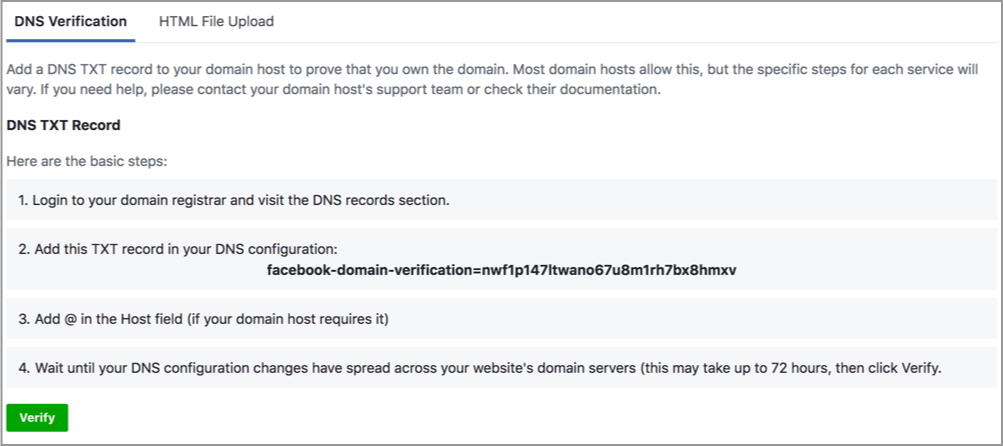
Add a DNS TXT entry to your DNS record to confirm ownership
The DNS Verification tab of your selected domain provides the TXT information you will need to add to your DNS record.
- Navigate to the DNS record section of your domain host.
- Add the TXT entry to your DNS record.
- Add @ to the Host field (if it is required by your domain host).
- Once the changes have propagated across your domain’s web servers, click the Verify button at the bottom of the DNS Verification tab for the selected domain.
Note: Typically, this change takes only minutes to occur, however, there are cases where it may take up to 72 hours to complete. - Leave the TXT entry in your DNS record as it may be checked periodically for verification purposes.
The precise steps you need to perform to add a DNS TXT entry to your DNS record may vary by domain host.
HTML File Upload
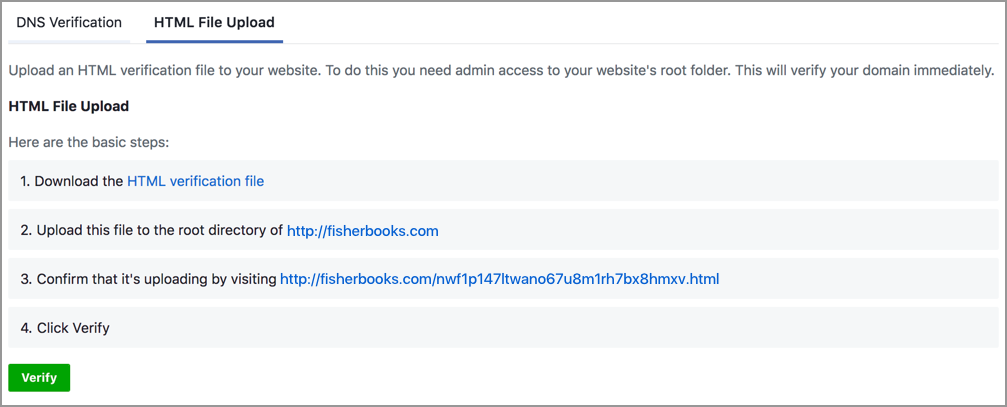
Upload an HTML file to your web directory and confirm domain ownership in Business Manager
The HTML File Upload tab of your selected domain provides the HTML verification file you need to upload to your website.
- Download the HTML verification file.
- Upload the file to the root directory of your website. You will be able to see that it is uploading at the link provided in the HTML File Upload tab.
- Once it is done, click the Verify button at the bottom of the HTML File Verification tab for the selected domain.
- Leave the HTML verification file in your website’s root directory as it may be checked periodically for verification purposes.
You need admin access to your website’s root folder to perform this type of verification.
Meta-tag Verification
The Meta Tag Verification tab of your selected domain provides the meta tag you need to add to your domain home page.
- Add the meta tag containing your verification code to the <head> section in the HTML of your domain home page.
- Confirm that the meta tag is visible by visiting your domain home page and viewing the HTML source.
- Once confirmed, click the Verify button at the bottom of the Meta Tag Verification tab for the selected domain.
- Leave the meta tag on your domain home page as it may be checked periodically for verification purposes.
That’s it! Your domain is now verified in Facebook.
Once your domain is successfully verified, you will see a green dot next to your domain name in your Facebook Business Manager account. When you hover over the dot, a black window will pop up saying that your domain is verified.