
Facebook Business Manager is where all of Facebook’s business tools live. It’s where you manage all of your Facebook marketing and advertising activities.
If your business uses Facebook, you should be using Facebook Business Manager. It’s an important tool that keeps your Facebook business assets centralized, safe, and organized.
If you’re not using Facebook’s Business Manager (whether intentionally or otherwise), however, you are missing out on multiple valuable marketing opportunities. While Business Manager is essential for agencies, it also has numerous benefits for businesses of all sizes that can improve the efficacy of your marketing or offer new features with new capabilities.
Whoever you are, in this article we’ll do our best to convince you that now is the time to make the leap to Facebook Business Manager, and we’ll show you how to get started.
But, first, let’s answer an important question: Exactly what is Facebook Business Manager, anyway?
Table of Contents
So What Is Facebook’s Business Manager?
As Facebook itself explains, “Business Manager serves as a one-stop-shop to manage business tools, business assets and employee access to these assets.”
Basically, it’s the place to manage all of your Facebook marketing and advertising activities. It’s also where you can control multiple users’ access to additional resources like your Instagram account and product catalogs. Here are some of its key functions:
- It keeps your business activities separate from your personal profile, so you don’t have to worry about posting in the wrong place (or getting distracted by cat videos when you’re trying to work).
- It’s a central place to track Facebook ads, with detailed reports that show how your ads are performing.
- It allows you to give vendors, partners, and agencies access to your pages and ads, without handing over ownership of the assets.
- Coworkers don’t see your personal Facebook information—just your name, work email, and pages and ad accounts.
How to set up Facebook Business Manager
Step 1. Create a Facebook Business Manager account
The first stage of setting up a Business Manager is to create an account. You’ll need to use a personal Facebook profile to confirm your identity but, as mentioned above, your coworkers and partners won’t have access to the personal information in that account.
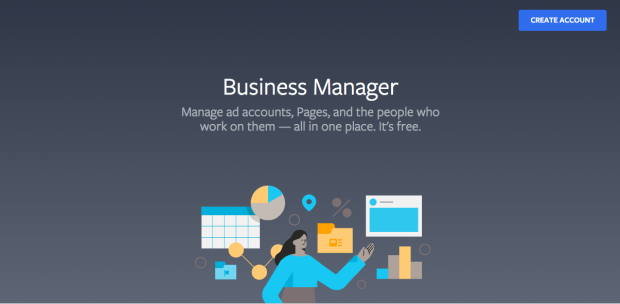
Go to business.Facebook.com and click the big blue Create Account button in the top right.
Enter your business name, your name, and the business email address you want to use to manage your Facebook Business Manager account, then click Next.
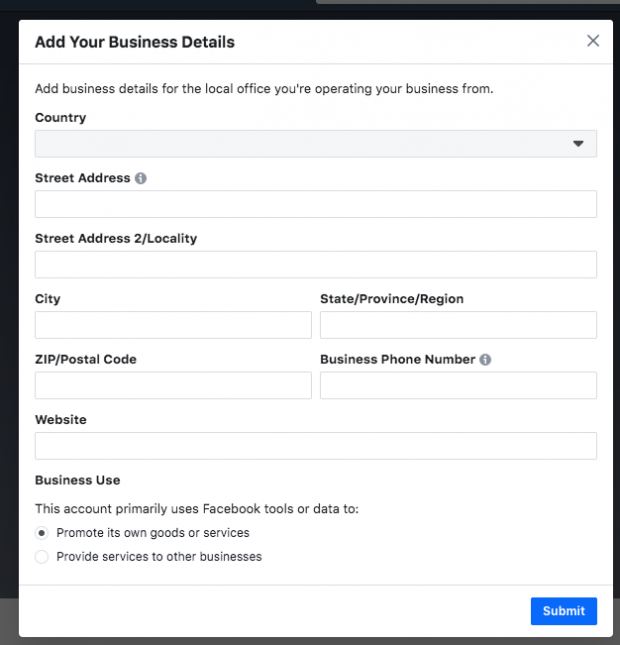
Enter your business details: address, phone number, and website. You’ll also need to specify whether you’ll use this Business Manager account to promote your own business, or to provide services to other businesses (like an agency). When you’re finished, click Submit.
Check your email for a message with the subject line “Confirm your business email.” Within the message, click Confirm Now.
Once you signup, you are launched directly into the Business Manager app.
The first step they will prompt is to create or ‘claim’ your Facebook business page and ad accounts.
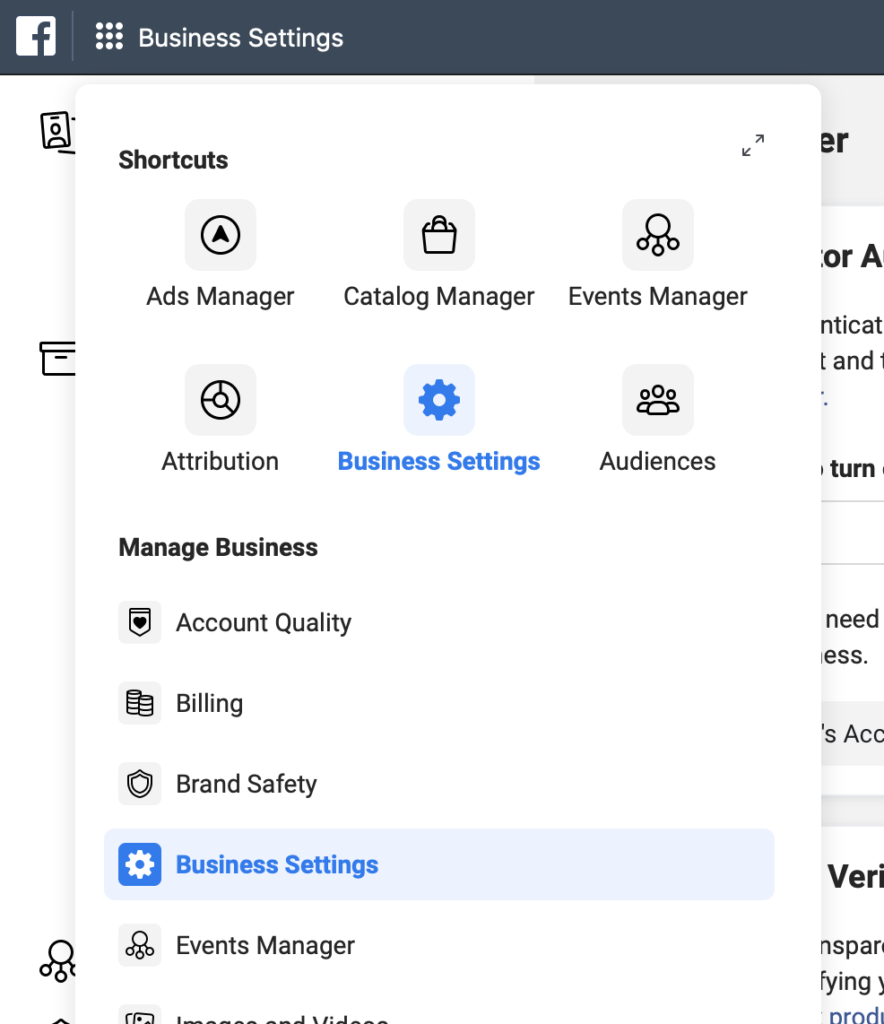
In the primary navigation bar, find “Business Settings” as an option.
When you first set up Business Manager, you’ll be given the option to add new accounts, request access to other ad counts, and create new ad accounts. You can also claim, request access to, or create new Pages. Here, essentially, you can manage everything related to your Business Manager.
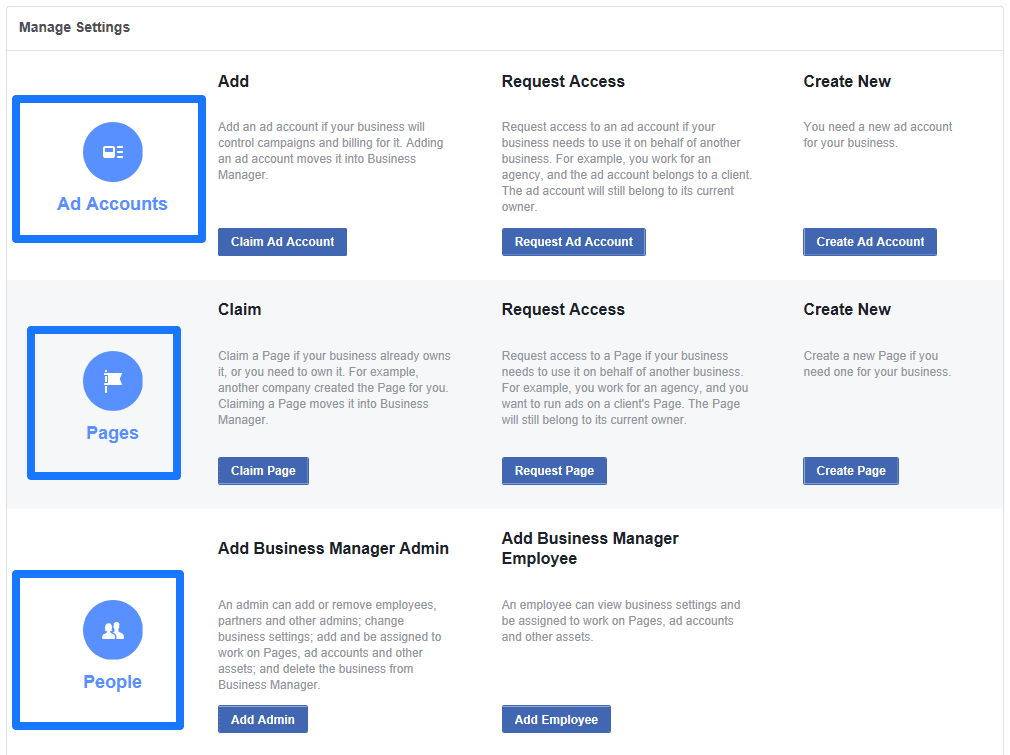
Here you can get started with ad accounts, pages, and people. They’ve simplified these options a lot, so it should be self-explanatory to see what you should be doing next (i.e. “Create Page” for first-time visitors, or “Claim Page” if you already have one up, etc.).
Step 2. Add your Facebook business page(s)
In this step, you have a couple of different choices. You can add an existing Facebook business page or create a new one. If you manage Facebook pages for clients or other businesses, you can also request access to someone else’s page.
That last distinction is important. While you can use Business Manager to manage clients’ Facebook pages and ad accounts, it’s important to use the Request Access option rather than the Add Page option. If you add your client’s pages and ad accounts to your Business Manager, they’ll have limited access to their own business assets. That’s a sure way to cause tension in your business relationship.
To add your Facebook page to Facebook Business Manager:
From the Business Manager dashboard, click Add Page. Then, in the pop-up box, click Add Page again.

Start typing the name of your Facebook business page in the text box. Your business page name should autocomplete below, so you can just click on it. Then click Add Page. Assuming you have administrator access to the page you’re trying to add, your request will be approved automatically.
If you have more than one Facebook page associated with your business, add the remaining pages by following the same steps.
Step 3. Add your Facebook ad account(s)
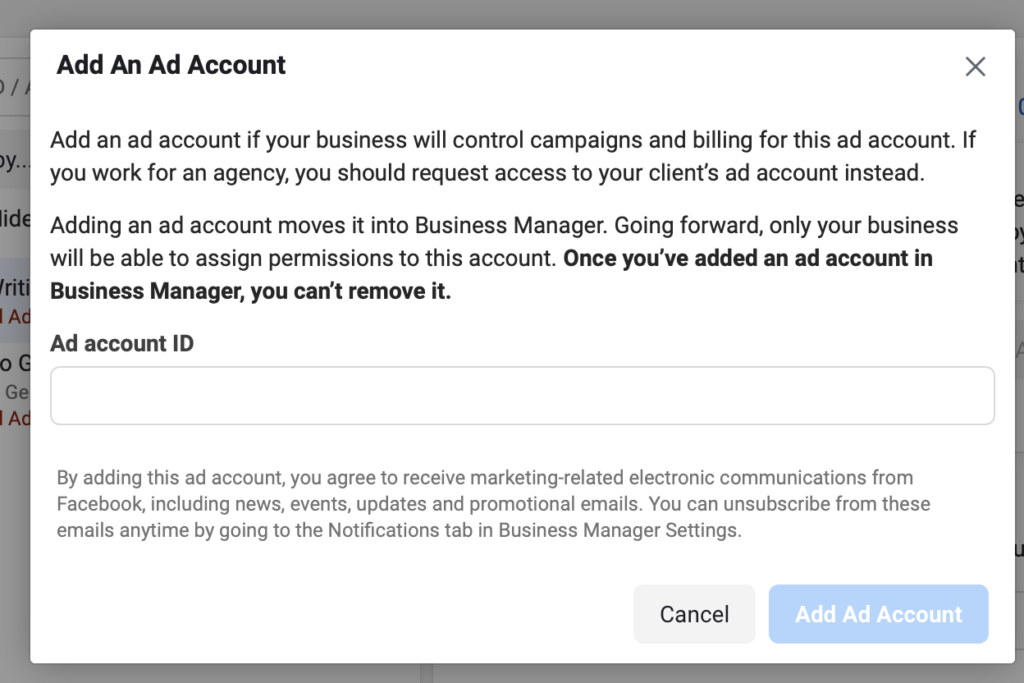
Note that once you add your ad account to Facebook Business Manager, you can’t remove it, so it’s especially important only to add accounts you own. To access a client account, click Request Access instead.
If you’re already using Facebook ads, you can link your existing ad account as follows:
- From the Business Manager dashboard, click Add Ad Account, then Add Ad Account again, and then enter the ad account ID, which you can find in Ads Manager.
If you don’t already have a Facebook ads account, here’s how to set one up.
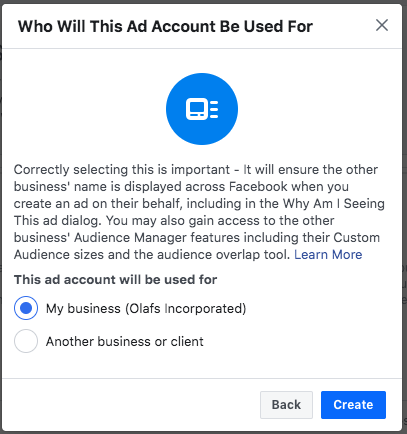
From the Business Manager dashboard, click Add Ad Account, then Create Account.
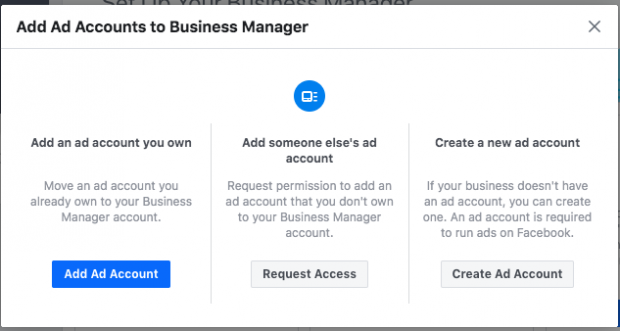
Enter your account details, then click Next.
Indicate that you are using the ad account for your own business, then click Create.
Each business can create one ad account right from the start. Once you are actively spending money in your first ad account, you will be able to add more based on your advertising spend. There is no option to request more ad accounts.
Step 4: Add Business Manager Admins and Employees
Keeping on top of your Facebook marketing can be a big job, and you may not want to do it alone. Facebook Business Manager allows you to add team members so you can have a whole group of people working on your Facebook business page and ad campaigns.
When you’re ready to add new team members to your Page or ad accounts, you’ll need to enter their email addresses. You should see their profile picture pop up.
When you do this, you can grant them either “employee access” or “admin access.” Employee access is more restricted, only granting them specific access to certain features on assigned accounts and tools. An agency, for example, would give employees access to the accounts that they personally are managing, not all of the accounts that the agency manages. Admin access gives someone full control over your business, including the ability to add more people, adjust their access, and alter the account.
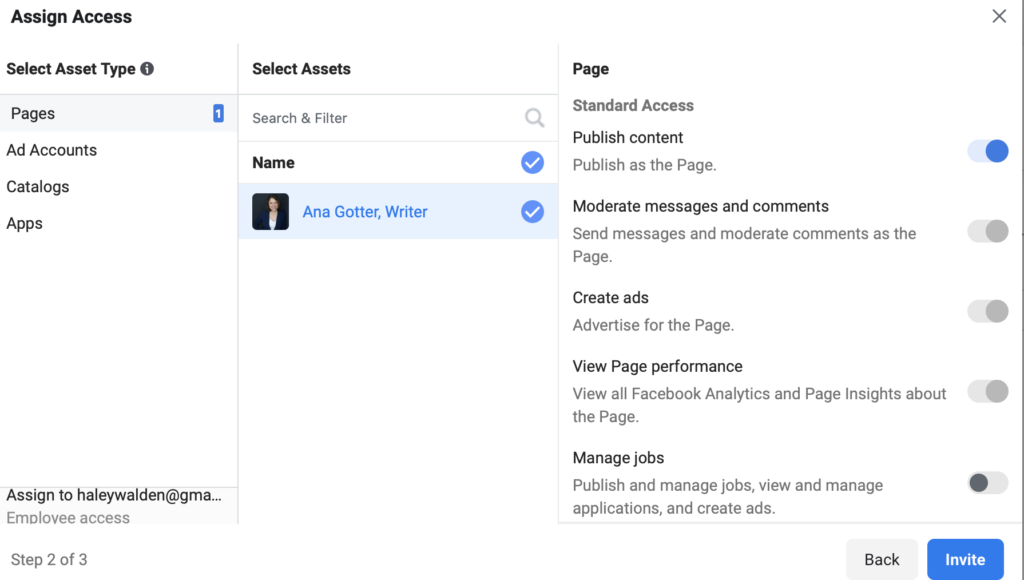
When you’re inviting specific users, you can choose which Pages you want to grant them access to, and which specific tasks you want them to be able to complete. You can limit this; even though “employee” roles allow someone to manage jobs, I can disable this feature for particular employees if I choose, which you can see here.
Step 5: Request Access or Claim a Page/Ad Account
If there’s an existing ad account you want to sync up with, fortunately this is pretty easy to do, too. Head to your main Business Settings section, and then look for “Ad Accounts.”
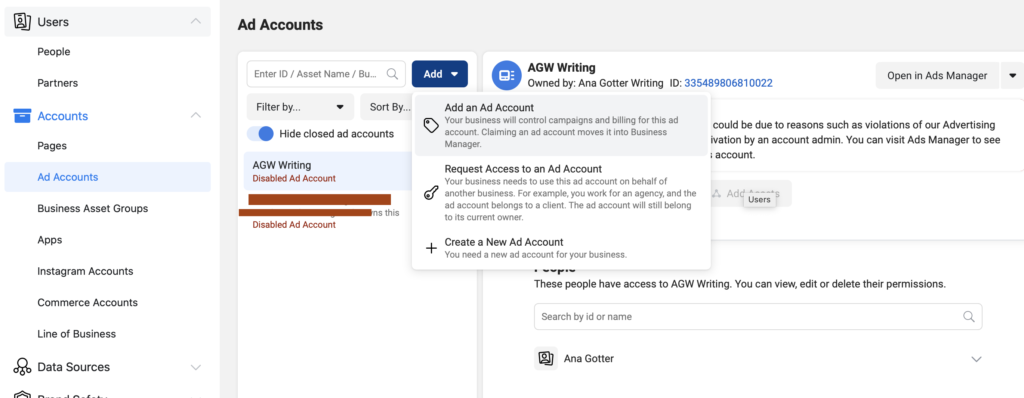
Click “Add” and then choose the correct prompt. If you want to Add an account, you’ll need to enter in the account ID. Note that once you add an account to Business Manager, you can’t remove it.
You can also request access to other ad accounts. If you’re synching up with a sister company, for example, or helping a client with their ad accounts, this is when you’d use this feature. You can either enter in the ad account’s ID (which the other party would need to supply to you) or have them Assign you as a partner utilizing a custom code that will be displayed here.
Step 6: Add your Instagram account
Now that you’ve got your Facebook assets set up, you can connect your Instagram account to Facebook Business Manager as well.
- From your Business Manager dashboard, click Business Settings at the top right.
- In the left column, click Instagram Accounts, then click Add. In the pop-up box, enter your Instagram login information and click Log In.
Step 7: Set up Facebook Pixels
What’s a Facebook Pixel? Put simply, it’s a small bit of code that Facebook generates for you. When you place this code on your website, it gives you access to information that will allow you to track conversions, optimize Facebook ads, build targeted audiences for your ads, and remarket to leads.
We recommend setting up your Facebook pixel right away, even if you’re not ready to start your first ad campaign yet because the information it provides now will be valuable when you are ready to start advertising.
For now, let’s get your pixel set up from within Facebook Business Manager.
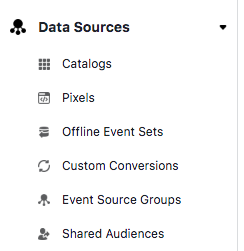
From your Business Manager dashboard, click Business Settings.
In the left column, expand the Data Sources menu and click Pixels, then click Add.
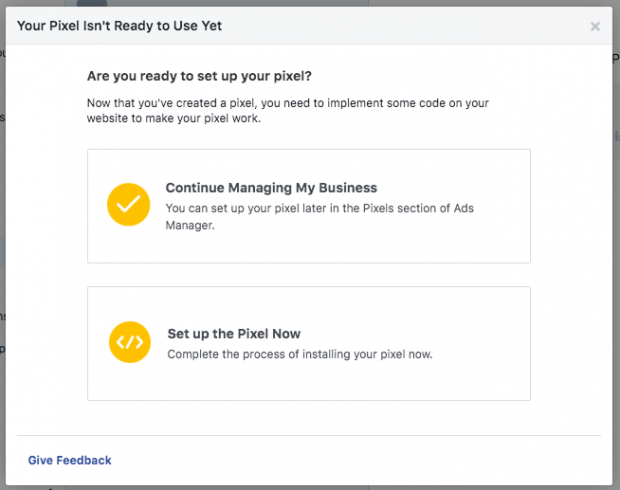
Enter a name (up to 50 characters) for your pixel. Enter your website so Facebook can provide the best recommendations for how to set up your pixel, then click Continue. When you click Continue, you are agreeing to the pixel terms and conditions, so you should read those before you go any further.
Click Set up the Pixel Now.
You can create up to 10 pixels with your Business Manager.
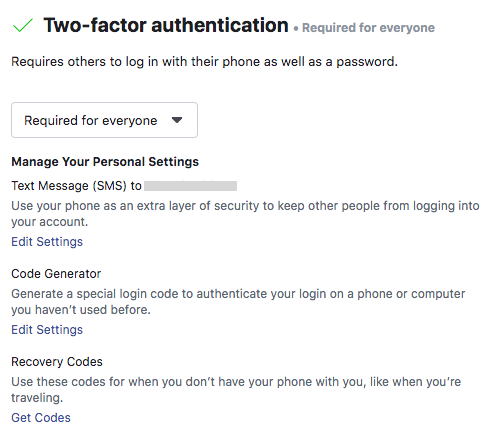
Step 8. Increase security on your account
One of the advantages of using Facebook Business Manager is that it offers extra security for your business assets.
- From the Business Manager dashboard, click Business Settings.
- In the left menu, click Security Center.
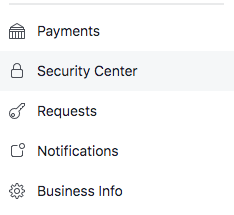
- Set up two-factor authentication. Setting it as Required for Everyone offers the highest security.
Conclusion
The Facebook Business Manager can seem daunting when you first log in. That’s normal; there’s a lot of content here, and it does take some time (and a bit of a learning curve) to get used to.
That being said, mastering the Business Manager is definitely more than worth it, even if you’re a single business owner running a single Page.
This tool will allow you to run much more sophisticated ad campaigns and keep a much closer eye on your ad account and Page in general.
Improved campaigns and better monitoring are always a good thing, allowing you to achieve more results faster.
Get the most out of your Facebook ad budget and save time with Think DigiAds.